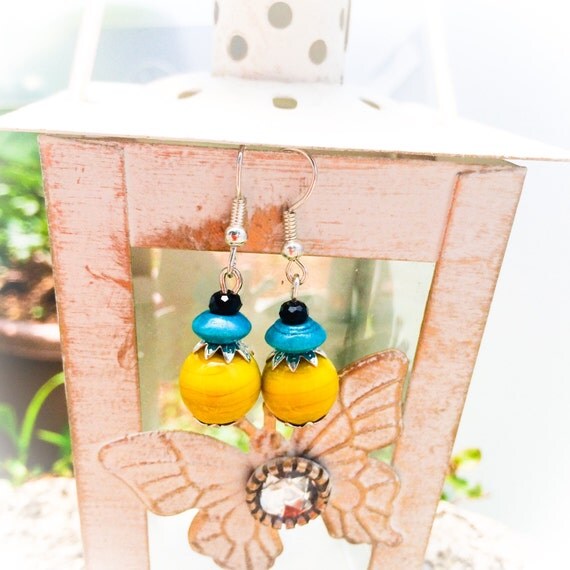
Selling Jewelry that People Want to Buy

Recently I signed up to sell my jewelry at a Holiday Bazaar. I had tons of jewelry from past shows that I felt were not getting the attention they deserved, even though I think it was priced right and I had great positive feedback from previous customers. Why was I always walking back with tons of unsold stock? 


I did a bit of thinking and put myself in the buyers' head. Ok, so why would someone want to purchase my jewelry? Perhaps to give it away as a gift? Or to wear it with something they already have. I get that for a buyer it is often hard to imagine a piece of jewelry without the context in which it could be worn. Often times, a buyer is unable to imagine all the possibilities. 

Now, we usually have no more than 7 seconds to grab someone's attention (see my previous post on this,) so how could I make it a no-brainer for a potential customer to buy my jewelry, and at the same time add immense value to their Christmas shopping? 

I figured I would have to come up with a way that would address these 2 needs of my potential customers (to buy a gift for someone or to buy something that goes with a piece of clothing they already have).

So I went on Pinterest and explored jewelry packaging. If you know anything about me you can probably guess what's coming. Yes! A new Pinterest board:


From all the ideas I screened, I liked the idea of "boxing" my pieces so they each get individual attention and respect! I designed this box that would double up as a stand-alone display space as well as something that is "gift ready". 


As you can see, I have taken away some of the "thinking" that usually goes into a buying decision and made it a no-brainer for my ideal customer to pick it up. The boxes are gorgeous in and of themselves, eye-catching even from a distance, and make it easy for someone to grab as Christmas presents that they do not need to be packed later. 

Each of these boxes was created in my living room and carefully set against a background color that complements and enhances it, helping a buyer imagine the possibilities. .

This is what my stall looked like with all the pieces lined up. Can you see how eye-catching it is? 


I have never had so many people comment on my stall as I had this time! Even those who did not buy said that they loved my presentation.

I must say it was an Aha moment for me. The market has spoken and it was a win-win for both of us!

Preparing for Craft Shows #3: Build your brand!

Hey there!

So, today I am going to share my experience with branding for your craft show. One thing to remember is that a craft show is an event that has a limited life span but your "brand", if you build it right, will live way beyond that and bring you repeat customers and new orders.

Based upon my countless failures and successes, I have put together these 5 nuggets of branding wisdom for you to mull upon as you prepare for your next big craft show or event. 


1. Always Carry Your Business Cards

This one is a no-brainer. The first thing that someone who seems genuinely interested in your brand might like is to have your business card. Now this does not have to be super fancy or crazy expensive but you could even DIY it with some creativity. If you are really into the game and would like to outsource someone to make a pack for you, try http://www.zazzle.com/businesscards
I designed and printed mine on my home printer.

Also, here are some great ideas for your to check out on my Pinterest board on Business cards.

Crazy Creative Business Cards.

I would put these details on my business card:
  • Your Name
  • Your Business Name and Logo
  • Your Creative Title (e.g. Designer, Crafter..)
  • A website they can find out more about you (If you don't have a website yet then this could be an online storefront or a blog)
  • An email address where they can contact you
  • All of your key social media handles like Twitter, Facebook, Pinterest etc.


Make sure to slip your business card into their bag of purchases so they contact you even after the event. Also, try to socialize around other booths and exchange business cards. You never know who might buy from you or what ideas you might pick up from them.


2. Use Creative Price Tags

The price tag is what most people will look out for first as they try to form an impression about your brand. And rather than have $10 written on a boring price tag, why not increase your chances of being liked, by picking price tags that are eye catching and aesthetically appealing.

Again, I have put together together this Pinterest board on price tags that you might like:

Creative Price Tag Ideas


3. Display Your Business Name

The only reason I recommend you to have your Display Your Business Name even in a craft show is because I want you to have a repeat business (from customers who are regulars at craft fairs) and for your brand to live "beyond the event". People make a note of and remember an attractive booth if your have your Business Name displayed prominently.

Also, if you already have an online shop or website, try to be consistent with the logo and theme of your brand.

4. Engage your Audience

Freebies and giveaways are some of the ways to engage with your audience. I mean, who doesn't like a freebie?! I often see small "Dozo" baskets (take free) on stalls. This just helps your audience form a connection with you and your brand. And they might feel like giving your booth more attention than they normally would. Remember, it's all about capturing people's attention and imagination.

I haven't tried this yet, but next time I plan to create even more engagement with my audience by running a contest through a Facebook event, so people who found out about the event on facebook and tell me they did will get a value-pack giveaway.


5. Promote Yourself

Ok, I know as crafters and designers we might be a bit shy about "promoting" or "selling" ourselves but you know what, it's ok. Promotion is another way of letting people find you easily.

If you are already on social media here are some before, during and after event tips to try:

Before:
1. Post "peek preview" pictures on Facebook or other sites as teasers.
2. If you don't mind sharing more details about the event location, go ahead let people know more about how awesome and exciting it's going to be, and where they can find YOU. (Booth number, location etc.)
3. Don't forget to let your friends know so they can spread the word about you!

During:
1. Look like you are enjoying yourself.  Keep moving about, fixing your stall and smiling to passers by. People are more likely to buy from you if you don't look desperate, anxious or concerned.
2. Tweet interesting snippets of how its going throughout the day, making sure to use event hashtags.

After:
1. Try to post pictures of your stall (with you in them if are not shy like me ;) and post them on social media with a note about how much fun you had and how successful your show was. 
2. Try to go on to the organiser's website or Facebook page and thank them for organizing the event. You will be surprised at how many people get to event pages after the event is actually over. 

So there you have it! My 5 tips on how to build your brand while you sell at craft shows. I hope you found this information valuable and will come back for more.  

If you missed any of my previous posts on Preparing for Craft shows here they are:


And, don't forget to Subscribe to this blog. I will be coming back with MORE ideas, tips and tricks! Have a great week and I will see you soon!
#etsy #etsyjapan #crafts #crafting #handmade #handmadeology #craftshows #sell #crafty #smallbusiness #branding #brand #sales #creative
#localbusiness #businesscard #business

Preparing for Craft Shows #2: What should the price tag read?

When it comes to pricing your handcrafted items, the million dollar question is "How much should I charge?" 

What does "Pricing it Right" Mean?

As creative people, this is an area where a lot of us struggle. We are consumed with self-doubt and self-worth as we place the price tags. We live with myths of our own creation. "OMG! Will anyone even buy it if it's priced so high?" "People like cheap stuff", "If it's cheap then I will sell more!", "Why would anyone pay $25, when they can buy something similar at Forever21 for $6"...

STOP UNDERPRICINGRemember that buying is an emotional decision. And you are NOT competing with China. You can't! So don't even try! People who care for the handmade label will come to you even if your items are priced higher than a factory made item that serves the same purpose. 

People don't go to Starbucks to buy "just coffee". They go there for the experience. They go there for the ambience. And they are willing to pay extra for that.


Focus on Quality and Uniqueness

As long as you keep your overall attention on quality, uniqueness and an enjoyable shopping experience, you are on the right track. Tout the Handmade label, and go ahead and price your item as high as you think it is worth. What's that, you ask?

And is there a formula?

Here's a rough pricing model that seems to work for a lot of artisans:
1. Hours spent x $7 (e.g. 0.5 h x $7 - $3.5)
2. Material cost (e.g. $5)
3. Hidden costs: Travel costs, Booth Cost, Electricity and other shared costs over the total number of items you are likely to sell (e.g. $2.5)

In my example, the cost so far is $11. To calculate the sale price, add a suitable profit margin. I am going with 50%, so that adds up to $22. This is your "Wholesale" price. 

Hours + Materials + Hidden costs + Profit = Base Price (or Wholesale Price)

You could sell 100 of these items and still make a profit. However, if you are selling directly in a craft bazaar or even on an online store like Etsy, I would double that to get the "Retail" price, which would be $44. (This is what a fancy retailer would display your item for in a shop window.)

There is a great article for Etsy sellers that talks about what to do if you think that the price of the item seems too high for the market. There is always scope for improvement in your method and line of production, the materials you source and how you source them (online or not).


And again, remember: DONT UNDERPRICE! It's just not worth it!!

Next time, we will look at even more aspects of selling in craft shows, so don't forget to Subscribe to this blog! Have a great week and I will see you soon!

In case you missed part #1 of this series, you can check it out here.

#etsy #etsyjapan #crafts #crafting #handmade #handmadeology #craftshows #sell #crafty #smallbusiness #branding #brand #sales #creative
#localbusiness #businesscard #business

Preparing for Craft Shows #1:You Have 7 Seconds to Make an Impression

When it comes to craft shows, I would like to make a bold statement and just say, "Display is Everything".

I read somewhere, that on an average, people give you no more than 7 seconds of their sweeping attention to form an impression. You might be making the most amazing crafts in the whole, entire universe, but if your display is poor, you get no marks for that baby. That makes sense, right, coz we are living in a consumer world overcrowded with stuff!


Being creative on your display requires a lot of planning and imagination, so make sure that's pretty high on your priority list. Going the extra mile is the difference between a successful show and one that's not.


So How Does One Stand Out From the Crowd?


Here's what I would say to you:

1. Go for a Cohesive Booth Design. 

Try to carry and display the same types of products. If you have 10 of the exact same items with only a color variation, you would have created a much more cohesive display than perhaps carrying 10 different types of items.

2. Don't Try to Appeal to Everyone. 

You might have heard this before, but if you are catering to everyone, you are selling to no one. What does this mean? Don't show the products that don't fit it with the ideal audience you are targeting! If you make custom iPhone cases, don't "also" carry jewelry and bags unless you are selling "character" goods.

3. Have a Concept. 

Instead of just making all kinds of "fabric bags", make specialized bags like "fabric sandwich bags" or "fabric onigiri (rice balls) pouches". (here's an aside: rice ball lunch pouches boxes are a boom right now in Japan)

4. Make it About the Customer. 

Weave customization into your products as much as possible. People love the idea of making a choice. For example, if possible, give your customer the choice of adding an initial or a custom message to an item they buy.

5. Chose your Props Wisely. 

Props are like icons that can hook the right customer. They can help the customer imagine the possibilities. For example, display some nicely wrapped gift boxes in your booth so your customer can think "gifts". They might end up buying some more for their family or friends. Or, if you are selling beach jewelry, then displaying star fish, beach towels, message in a bottle etc., help passersby form a visual connection with your booth.

6. Carry Enough Inventory but Don't Crowd it! 

Do your research on how many people are likely to attend (does not have to be super accurate) and how many stalls are there likely to be. (The organizers can easily supply you this information.) This would give you an idea of how much inventory to carry. I would say, carry more inventory than what you plan to display so you can replenish sold-out items easily, but don't crowd your stall! Nothing is worse than looking at a cluttered display - it send out a message that your products are "cheap". And that's the last thing you want do!!

See my Pinterest Craft Show Display Ideas board for tons of unique display ideas:


Next time, we will look at even more strategies to make your booth stand out in the crowd! If you have done some selling before, I'm sure these points with resonate with you. Do share your experience and your success strategies in the comments below!

And, don't forget to Subscribe to this blog.  I will be coming back with MORE ideas, tips and tricks! Have a great week and I will see you soon!

#etsy #etsyjapan #crafts #crafting #handmade #handmadeology #craftshows #sell #crafty #smallbusiness #branding #brand #sales #creative
#localbusiness #businesscard #business

Preparing for Craft Shows (New Series Sneak Peek)

Hi everyone!

So, I am starting a brand new series for all of you crafty folks who do (or dream of doing) the occasional craft show or flea market. In this series I plan to cover a variety of topics around preparing your booth and attracting customers to it. Since this is a sneak peek post, I am going to keep it super short, but I do want you to know the types of things that are in store for you. 

So don't forget to Subscribe to this blog!


I know that running a booth can be both overwhelming and time consuming. It is a lot of work! I typically spend weeks in planning and running around to turn the concept and display of ideas for my stall into reality. There are a bunch of different things to think about such as:


  • How many items should I carry and display?
  • What should my layout be? Should I build my own display or should I rent?
  • What's the best way to display my creations so that my booth looks attractive and inviting?
  • How should I promote myself?
  • How should I price my items? And how to should I collect the cash? 
  • How should I package my stuff?
  • How should I dress? And how should I interact with my visitors without coming across as pushy!
  • What follow-up actions can I take so that customers can find me.
  • etc.!

That's a lot of things to think of, right? And it's always nice if you can get all the advice you need all under one roof. So welcome to that roof! :) I will be sharing tons of information based on my own experience of participating in craft shows and events in Japan.

So I look forward to you joining me in this series. As a parting piece I want to share  with you my Craft Show Display Ideas Pinterest Board that I am constantly updating. You can get lots of ideas to start planning/dreaming about your own craft show booth, maybe soon?


That's all for now. Don't forget to Subscribe to this blog, so you don't miss out any post! Also, do let me know if there are any specific types of tips you are looking for and I will try to cover them in the series. I will see you soon! Have a great week!


Art Supplies Haul Plus Random Doodling

Has anyone heard of or used Faber Castell Gelatos? If not, I can tell you right now that this product comes with the promise of vibrant creamy colors and is supposed to be amazingly easy to use! Popular as it is with artists (especially card makers and art journalists,) I surprisingly did not find it in any of my regular Art Supplies haunts in Tokyo (I have been looking for almost a year - feels like a decade).. Until yesterday when I accidentally discovered it at Joyful Honda! 

I could not conceal my delight and anyone could tell I was besides myself with joy. 


Ok, ok. I could have ordered it online and all that but when you think about shipping costs and negative eco-points I thought I should be a good girl and wait. Well the wait paid off!

Joyful Honda (Mizuho) recently re-did their Arts and Crafts floor and that's when they must have added it. Or, they might have listened to the enquiries of an eager customer like myself. LOL! At ¥1,749 they are a bit pricey for a pack of four, but I think they should last a while. Let' see! I got myself 2 sets. Aren't they yummy?


Can't wait to use them!

I also bought a ton of yummy Acrylic paints, mainly Americana and Ceramcoat - all replacements for colors I had run out of (average price ¥146).


Last but not least, I just had to pick up these gorgeous patterned paper by Bo Bunny and Jen Hadfield. I am especially happy about the Jen Hadfield set because it has my favourite Moroccan print plus Chevrons! Rare sights in Japan, I tell you.

Ok, and you might be thinking that I did this doodling with my new supplies? Actually no, I did it before. I got totally inspired by Flora Bowley and then went out to splurge on my new supplies.


If you like to keep in touch with blog posts such as these, you can always subscribe here. 
Talk to you soon..

#fabercastell #gelatos #craftsuppy #howto #DIY #crafts #color


Art Journal Page

I had fun doing this Art Journal page today. Took pictures of every step of the process. Will post a YouTube video if anyone is interested.. Let me know in the comments below!


Quick Tips for No-Mess Painting

Do you wish you could paint more but dread the thought of cleaning up afterwards? Well here are some quick tips on all you'll ever need to have a great painting experience without creating ANY mess. 

Read on..


Tip #1: Invest in a Water Brush Pen

My #1 tip for anyone who would like a no-mess painting situation, is to invest in a water brush pen. This is a neat little device that costs between $5 to $10 and has a tiny squeezable barrel feeding the brush and can hold up about 50 ml of water. I use Pentel's Aquash brush. It's refillable and capped, so there are no leaks or spills. The good thing about this water brush pen is that the brush is made of synthetic fibres which, unlike a regular brush, never wears out! I have had mine for over 2 years and it's still gong strong. 


Tip #2: Invest in Water Soluble Crayons

My absolute favourite is the Neo Pastel II by Caran d'Ache. These can be a little pricey but boy, do they last! Remember, for water color painting, you need Neo Pastel II (not I). I accidentally purchased the wax crayons first (which are not bad but not my favourite for my kind of painting.) Neo Pastel II have a creamy, smooth application and you only need to pick up a little with your water brush pen. After you are done with one color, just wipe off the brush on a dry or wet tissue.

Tip #3: Invest in Water Soluble Color Pencils

The reason why you would need Water Soluble Color Pencils in addition to the Water Soluble Crayons is because it helps to color is small spaces plus sometime you just want to go for the pencil effect. If budget is an issue, skip this purchase entirely for now (and maybe treat yourself to it one day).

I really can't decide between the Mitsubishi UNI selection or the Dervent Inktense ones. I love them both equally! They produce vivid colors and are easy to apply. If you can afford it go for 24 colors.


This is what the inside of my Mitsubishi UNI water color pencil set looks like. I have used this set for over 6 months and as you can see, it looks almost unused. But the reality is far from it. These pigments are so intense that you only need to pick up a little color on your water brush.


My handy-dandy painting pouch typically contains only the following six items:
1. My 4 x 7 inch moleskin water color journal
2. A pencil
3. An eraser
4. My 10 color Neo Pastel II set
5. My Water Brush Pen
6. A sharpie

And the best thing is that there is no clean-up required!


See how compact it all is..


Hope you found these tip useful. If you liked my tips please leave a comment. And don't forget to subscribe for more tips for the artsy-craftsy person in you here

#art #craft #painting #watercolor #pentel #carandache #Uniball #craft #moms #craftymom

Art Journal Page: Step by Step Video

Hey guys!

Today I am sharing a video of an Art Journal page I had created for my last blog post. If you are an aspiring artist who wants to try your hand at collaging and mixed media, this video is for you! You can watch every step along the way as this dreamy girl's page comes alive with colors. Enjoy!

Jewelry Making Basics #4: Making a Simple Pair of Dangle Earrings (Free Tutorial)

So you want to make your own jewelry? 

I hear that! And that's why I put together the Jewelry Making Basics series so can you start off by making yourself a cute little pair of dangle earrings. Guess what, we are at #4, the last in this Basics series. If you haven't yet visited the previous parts, here there are, packed with information and useful links:


I plan to post more such tutorials in upcoming posts, so don't forget to Subscribe to this blog.

Ok, so let's jump right in.

The Ingredients

This is my selection of beads. I picked 2 different sizes of round beads and one sparkly disk bead (or Rondelle) for each set.


Here are the findings I use: Fish Hooks, Bead Caps, Head Pins.


Ok, now for the tools (from left to right): Flat Nose Pliers, Round Nose Pliers, Wire Nippers. Keep it simple!


The Creation

This is what my simple creation looks like. Yay! 


The Video

I have put the steps together in a simple video, (it's easy!) so check it out:


A Giveaway!

So now it's your turn! Post a picture of your creation in the comments below and win 20% off my jewelry collection on my Etsy store. (Each person who post a picture get's one coupon. Offer valid till this blogpost is alive!) Your creation can be simple, fancy or OOAK!

And that's it for now! Hope you liked this series - send me a comment! And don't forget to Subscribe to this blog. Have a great week and I will see you soon!
#etsy #etsyjapan #crafts #crafting #handmade #handmadeology #craftshows #sell #crafty #smallbusiness #branding #brand #sales #creative
#localbusiness #businesscard #jewellery #business
 #how to

Jewelry Making Basics #3: All About Tools (Free Tutorial)

Hi everyone! 
Today I'll cover part #3 of my Jewelry Making Basics series, and this will be all about Jewery Making Tools, literally, the most vital entities in our jewelry making endeavours!

I hope you got to read my two earlier posts Jewelry Making Basics #1: All About Beads and Jewelry Making Basics #2: Jewelry Findings/Parts. If not, you can just click on these links and catch up on all that you missed! Also, don't forget to don't forget to Subscribe to this blog so you don't miss a post!

Ok, so let's dive in.

Tools, Tools, Tools

When I first started making jewelry, the very first tool I invested in was a pair of Round Nose Pliers. Although it lost its precision over the years, I still have it! It's rusted too, but I'll share the image anyway. Here we go..well used and well loved!


These pliers are rounded and tapered from thick to thin. What are they used for? Basically for bending a wire or a head pin into a loop. The tapering nose allows for creating loops of differing sizes (diameters) by holding them at the appropriate position along the length of the nose. (that sounds funny)

The other tool that I rely on heavily is this pair of Wire Nippers. Once my loop is created, I use it to cut off the extra wire or head pin.


If there are only two tools that you can afford or care to invest in, it's got to be these two! In fact, for the longest period of time, these were the only two tools I possessed!

Later, I invested in Flat Nose Pliers. What do I use them for? For straightening bent wires and for creating 90 degree angles. As you can see (below), mine are serrated on the inside and the serrations provide a little more grip on the wire. But they could also scratch the surface (especially if it is coated), so you need to be careful. I often use a piece of felt in between to prevent scratching. I bet there is a better tool out there to take care of this precise need but we will try to stay simple for now.


As you learn the ropes and get advanced in your skill, you will become cognizant of the fact that there are a TON of tools out there in the market made by various makers, each performing a very precise function in the jewely making process. Some boast grip, others tout the angles or precision. Here is a great resource by Fire Mountain Gems and Beads, explaining some of the commonly used jewelry making tools. That's about 20 different tools right there!

In this short video I cover three simple skills using three Jewelry Making Tools:


Where to Buy Jewelry Making Tools

If you are just testing the waters and not a 100% sure that you will stick to your jewelry making hobby, you could visit a dollar store or a ¥100 shop to pick up some starter tools, but I can tell you from experience that these items will not last too long (sadly). But if you are looking at jewelry making as a long term hobby, it might be a good idea to invest in some of the sturdier and good quality brands such as Wubbers or Lindstorm

My favourite place for tools shopping in Tokyo would be Tokyu Hands. Bead and supplies stores such as Kiwa and Parts Club will also carry a handy collection of tools. But there are a ton of online options as well, including Amazon

Another great option would be to purchase online from Etsy, the global handmade marketplace. Here is a list of some suppliers on Etsy that sell high quality brands internationally from the US, and UK. Many of them offer related jewelry making supplies as well, so definitely check them out in case you want to combine a shipping order and bring down the price. Here we go:

Ok, we're nearing the end. Next time, we are going to actually make a pair of dangling earrings using a basic set of Beads, Findings and Tools. Remember, we are trying to be able to make something simple like this pair of danglers.


So get your materials together and get ready for next time. That's it for now! Don't forget to Subscribe to this blog and keep coming back for more! 

[P.S. I would love to see your comments or any questions you might have. Will try to answer them to the best of my ability and knowledge! Ok, this is the last thing I'm going to say. Cheers! Have a great week!]

#etsy #etsyjapan #crafts #crafting #handmade #handmadeology #craftshows #sell #crafty #smallbusiness #branding #brand #sales #creative
#localbusiness #businesscard #jewellery #business
 #how to

Jewelry Making Basics #2 : Jewelry Findings/Parts (Free Tutorial)

Hi everyone! 
So, I hope you got to read my earlier post Jewelry Making Basics #1: All About Beads. And if you didn't, you can just click on the link above and catch up on all that you missed about Beads Basics. Also, don't forget to don't forget to Subscribe to this blog so you don't miss a post!

This is part 2 of my Jewelry Making Basics. In this post I am covering the basics of Findings and Parts, so let's jump right in!

Types of Jewelry Findings

In jewelry making terms, "Findings" are parts that link beads together. These include earring hooks, jump rings, crimps, clasps, spacers, bead caps and more. Here is a great resource put out by Joann, the craft store. It gives you a visual description of all the types that are out there.

Of, course, if you want to restrict your jewelry making hobby to a small scale, you will only need a few of these types. For example, in these simple dangle earrings I made, I only used Fish Hooks and Head Pins.


Here is a visual of some of the findings that I reach for the most: Fish Hooks (for earrings), Head Pins, Jump Rings, Clasps (for necklaces, bracelets and anklets.)


And of course, I could not do without mentioning these babies: Spacers, Bead caps and Filigree. Are you beginning to see where and how these might be used? If not, don't worry, coz you will see their place very soon when you put together your own piece of jewelry.


Jewelry Findings Materials

Earring findings are typically made of Silver Plated Metals, 925 Silver, 14K Gold, Titanium, Brass to name a few. Here is a great resource that talks about metals and alloys that are safe to use in jewelry making. Of course, if you buy your Findings (or Parts as they are called in Japan) from a regular craft store, you will not need to mess with learning about these different metals. What is useful to know though, is that there are some types of metals that will not cause allergies. Here is a great resource about buying the right type of metal if you have allergies or if you are making a pair for someone who does (very important!)

Findings in Typical Colors

Basically, if you want to go crazy, you can buy findings in any color you like - Orange? I'm sure you will find them somewhere on Google. I like to be a little crazy but not too much! In my stash of metallic findings I have Gold, Silver, Copper, Brass, Black, Patina Pink (also called Pink Gold or Rose Gold). Recently I have also seen White Gold in jewelry stores.

The thing to remember while picking a color is that all of your findings in a single jewelry piece will need to be the same color or closest match (seems obvious but I've often made the mistake of not stocking up on complimentary pieces). For example, if you are investing in black Fish Hooks, make sure you also pick up other coordinating parts like Pin Heads, Jump Rings or Clasps in the same color and preferably from the same maker. You may not be too picky right now, but as you develop your skills and a keen eye, you will realize that even within black there are MANY shades and textures!!


Where to Buy Findings

If you are visiting/living in Tokyo or other parts of Japan the staple stores for Findings (that also have an online presence if you can read Japanese) are Kiwa, Parts Club and Tokyu Hands. If you don't have access to Japanese help, it's best to visit directly. Kiwa and Parts Club do have outlets in Asakusabashi and you can find Tokyo Hands in Shibuya or Shinjuku. 

The other option would be to purchase online from Etsy, the global handmade marketplace. Here is a list of some sellers on Etsy that sell high quality, unique and interesting findings from the US, UK, Canada and Germany. Many of them have Discount Coupon Codes and Sales that you could take advantage of, so check them out:


Ok, that's it for now. Next time, we will cover jewerly making tools. Don't forget to subscribe and keep coming back to check for more! 

Oh, and if you would like a discount on any of the jewelry I make, use the coupon code BLOGOFF in my Etsy store themagicofbeads (valid only for a limited time). See you next time!

[P.S. Please leave a comment and let me know if this was useful! Bye!]
#etsy #etsyjapan #crafts #crafting #handmade #handmadeology #craftshows #sell #crafty #smallbusiness #branding #brand #sales #creative
#localbusiness #businesscard #jewellery #business
 #how to

Jewelry Making Basics #1 : All About Beads (Free Tutorial)

Would you like to be able to make your own jewelry but want to keep it to a small scale, without having to spend a TON of money or time? Something simple, maybe like these Bohemian inspired summer danglers? Then read on..


 My Etsy Store Listing


Ok! So I am starting a new series called Jewelry Making Basics, where I will be sharing with you entry level skills for bead jewelry making along with information about where to find materials if you are living in Tokyo/Japan, as well as online resources from where you can easily have materials mailed right to you post box.

So please leave a comment on this post below, and don't forget to Subscribe to this blog for automatic updates via email.

For the first post I am going to share some resources about different types of beads that exist out there. You can also Google and find out more, but this post could be your starting point.


Bead shapes

My favourite bead shapes are round, square, rondelles and bicones. But there are a variety of different shapes that creative peeps have come up with. Here is a great resource on bead shapes http://bit.ly/SWDzMK. I could count at least 40 and I am pretty sure there are more!!!


Bead Sizes

Beads sizes are measured in "aughts". Typical sizes are 6, 8, 11, 15. The larger the size, the smaller the bead. To make my wire wrapped jewelry, I typically use a mix of sizes 11 and 6.
Here's a great resource that talks about bead sizes: http://bit.ly/1lvtfWG. There is also this wikipedia article on bead sizes.


Bead Types

There are several. Seed beads, Lampwork beads, Fresh Water Pearls, Power-Stone beads, Gemstone beads, Metallic beads just to name just a few. There is a great board I found on Pinterest that can show you all the amazing possibilities with bead types.

Bead Exporting countries

Some countries famous for their glass beads are: China, Austria, Czech Republic, Japan and India. Here is a statistical map of exports from various countries: http://bit.ly/1hURRce
Japan and India are famous for fresh water pearls. India and China take the lead in the gemstones market.

Jewelry Supplies Shops

I typically buy my beads and other jewelry materials from the US, India and Japan. I know that what I buy in the US would include a mix of imported beads coming in from other countries, but I like the choice, range and quality control. My favourite bead store in the US is Shipwreck Beads. I call it the COSTCO of beads! And I think they also offer international shipping. I also visit Michaels, Joann all the time, especially around SALE time ;)

Beads found in India include those imported from China as well as a lot of natural gems and stones from all parts of the country, and what I like best about shopping in India is that they are so affordable, though you do have to take the help of locals to find where all the wholesale action is. Be prepared to have to ask for a specific type or color of beads because not everything is displayed at eye level. The shopkeeper will typically have someone bring out a box from the back of his shop to "show you". Then you decide on the amount you want, it will be weighed and given to you in a small bag on the spot. I also found this online shopping guide for glass bead dealers in India.

Buying beads in Japan is like shopping in paradise. Everything is visually displayed, neatly and beautifully packed (which might not be a great thing environmentally, but ya, you can find exactly what you need).

The bead mecca of Tokyo is located in the Asakusabashi and Okachimachi areas. Asakusabashi is pretty friendly to hobbyists but Okachimachi is mainly for retail and wholesale and a while ago when I went into a shop there, I was asked for my business card to even enter. (!!) Back then, I had not established my business so I had to satisfy myself with window shopping!

Shops that carry a large collection of beads that I like to shop at are: Joyful Honda, Tokyu Hands, Parts Club, Kiwa, Yuzawaya to name a few. Some of them have online stores as well, so check them out.

Online Jewelry Stores in Japan

While there are a ton of Japanese stores that have an online presence, I'd like to introduce Etsy to you, if you did not already know. Etsy is an online marketplace for handmade items, supplies and antiques. At the time of writing this post, Etsy has about a million sellers and about 30 million buyers worldwide.

As some of you know, I run my own jewelry store on Etsy called TheMagicOfBeads. Currently I am offering a 10% discount on my Etsy store here for anyone interested in buying ready made jewelry. Please use the discount coupon codeBLOGOFF to claim your discount. [Note that this discount code will only work on my store: TheMagicofBeads and not the whole of Etsy!]

I am also sharing a list of some of my favourite Jewelry sellers on Etsy Japan. Check them out!

1. Kojica
2. OfOnAWhim
3. Aya1Gou
4. CapriciousBijoux
5. HoriSweetShop
6. Pemabeads


Ok, that's it for now. Next time, I plan to cover Jewelry Findings. Don't forget to subscribe to this blog, and do leave a comment below about what you think about this series!

Have a fantastic week!
#etsy #etsyjapan #crafts #crafting #handmade #handmadeology #craftshows #sell #crafty #smallbusiness #branding #brand #sales #creative
#localbusiness #businesscard #jewellery #business
 #how to